-
 Blog
Blog
-
 Take control of your testing process!
Testing is an integral part of a software product’s life-cycle. Some people prefer executing their tests continuously while they develop, others have a separate testing phase before each release. The goal, however, is always the same: finding bugs. The more, the better.
Unfortunately, the time available for testing and for writing new tests is limited. At some point, you have to get on with development, ship your software and be confident it contains no serious flaws. Often, more tests exist than can be run in the available time span. This is especially true if your tests are executed manually, as is the case for many of our customers. Then the question becomes: which tests do I select to find the most bugs before the release?
Research has shown that untested changes are 5 times more likely (“Did We Test Our Changes?”, Eder et. al., 2013) to contain errors than tested changes. It is therefore a good idea to ensure that all changes in your code base are tested at least once. This is true whether you do selective manual tests or execute your whole test suite automatically every night.
Do you really know what your tests do? Which parts of the system they touch? And do you know exactly what has changed in your system since the last release? Every class, every method that was modified in some way?
If so, I congratulate you. Please stop reading now, this is going to be very boring for you. We didn’t know. But we wrote an analysis that could tell us. We call it the test gap analysis. It shows you what has changed in your system since a certain point in time (e.g., your last release or the start of your current iteration) and which of these changes have not been tested.
What do I gain?
You get transparency over what your tests actually achieve! Knowing which changes have and which haven’t been tested allows you to make smart decisions about which tests to run or write. It also lets you adjust your testing strategy on-the-fly if there’s an important change that has not been tested yet. All in all, you gain more control over your testing process and avoid untested changes.
How does it work?
The analysis consists of three parts: change detection, profiling and gap detection. The first finds all the changes that occurred in your code base since a certain point in time (the baseline). The following tree map visualizes a system and all changes to it since the baseline: Each rectangle corresponds to a method in the system. Methods that are in the same class are next to each other in the tree map. If you hover over a rectangle with your mouse, a tooltip will tell you which method it corresponds to.
Each gray rectangle is an unchanged method (the code is exactly the same), each red rectangle is a new method that did not exist in the baseline and each orange rectangle is a method that was changed with respect to the baseline.
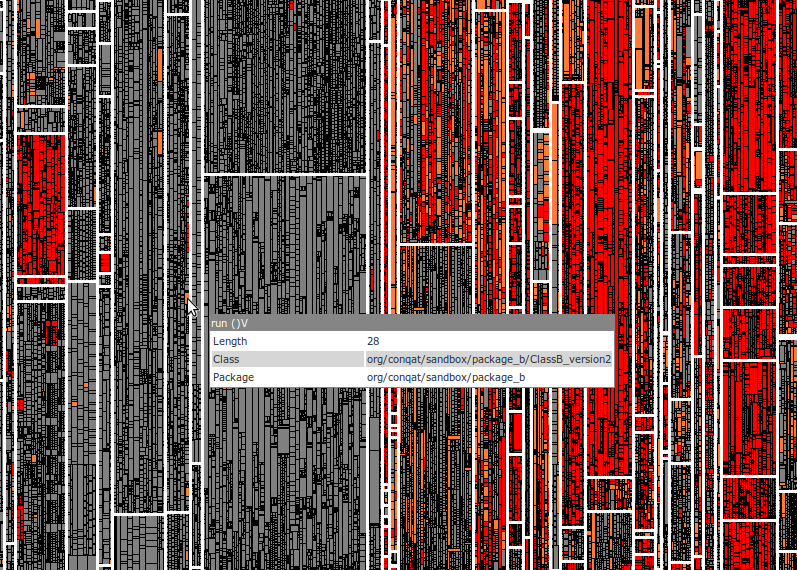
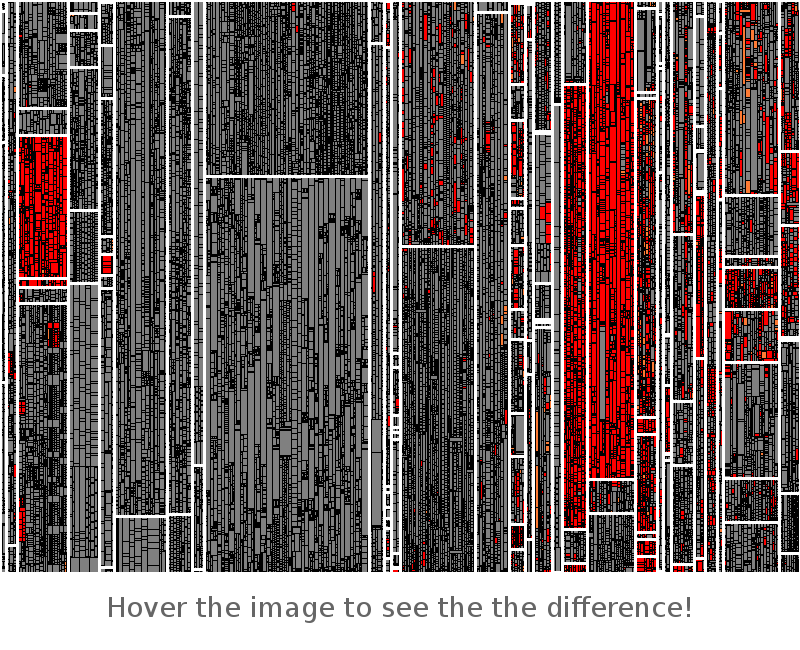
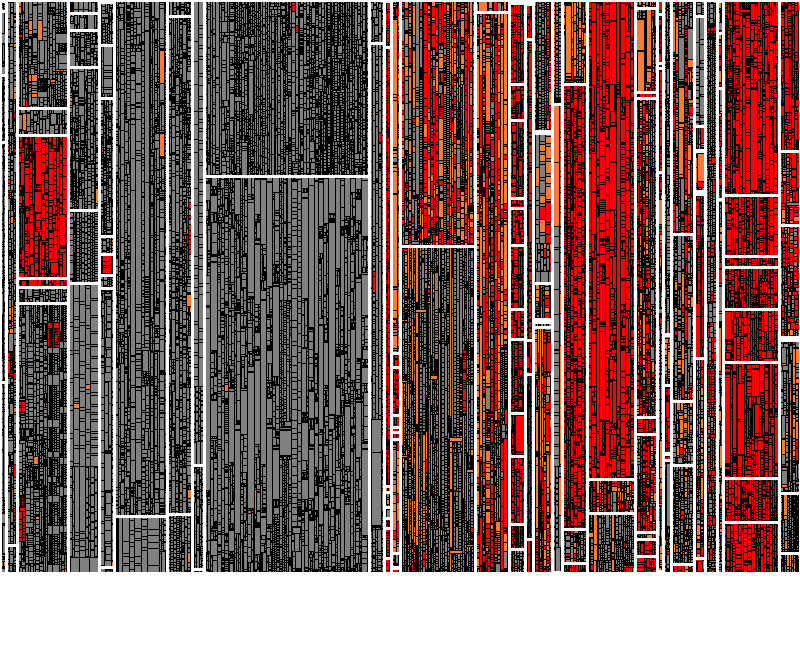
There are different kinds of changes from a tester’s perspective: some are interesting, e.g., that new feature you spent a month working on, and some are not, e.g., when you used your IDE to rename a class which changed every file that references it. We want to see only actual changes that have to be tested, not refactorings. Therefore, our analysis applies some advanced techniques and filters out all changes that were mere renames and moves of existing code. The following tree map shows the same system after we detected a large portion of the rename and move refactorings. Looks a lot cleaner, doesn’t it?
The second part of our analysis profiles your tests to find out which parts of your system they execute. We know that some tests are sensitive to changes in performance and that profiling normally incurs a hefty performance penalty. Therefore, we use a special profiling approach that minimizes the performance impact but still produces the data we need.
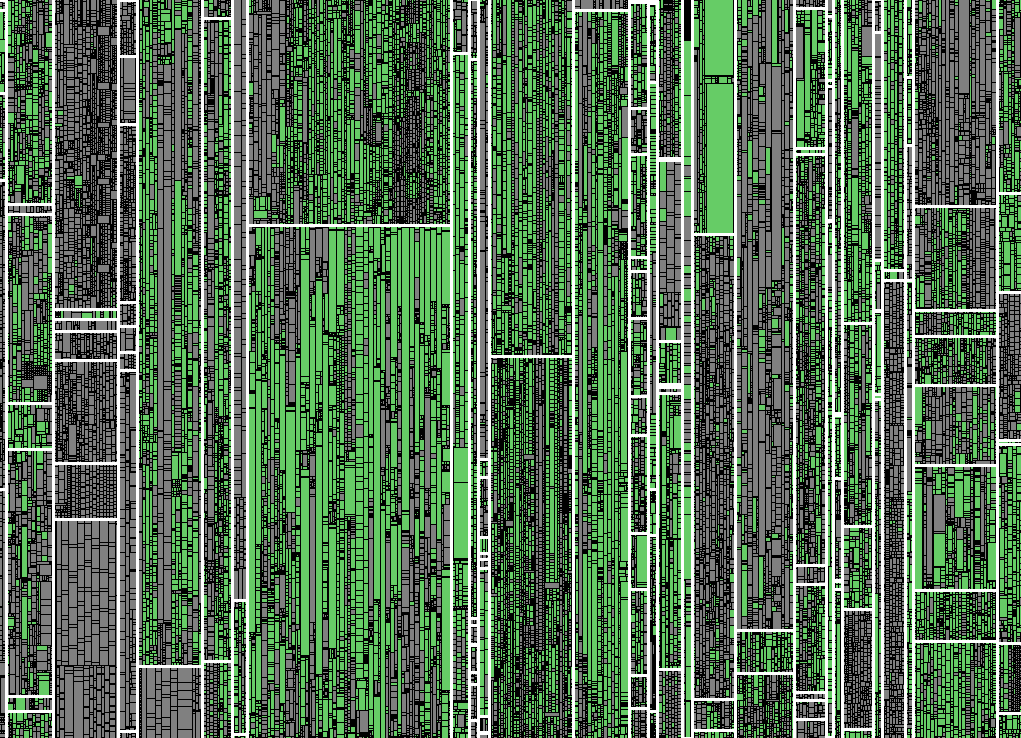
Again, we can visualize the result of profiling your tests as a tree map. Each green rectangle corresponds to an executed method, each gray rectangle is a method that was not executed.
The final phase of our analysis combines these two data sets and produces what we call »test gaps«, i.e., methods that have been changed but not executed. It takes into account not only the baseline and the latest version of your software but also knows about all intermediate versions you executed tests on. Thus, if you test a method and then modify it afterwards, it will show up as a test gap.
The following tree map again visualizes this: Grey rectangles are unchanged methods, red rectangles are methods that were added and not tested, orange rectangles are modified methods that were not tested and green methods were tested after their last modification. Thus, all red and orange parts need your attention.
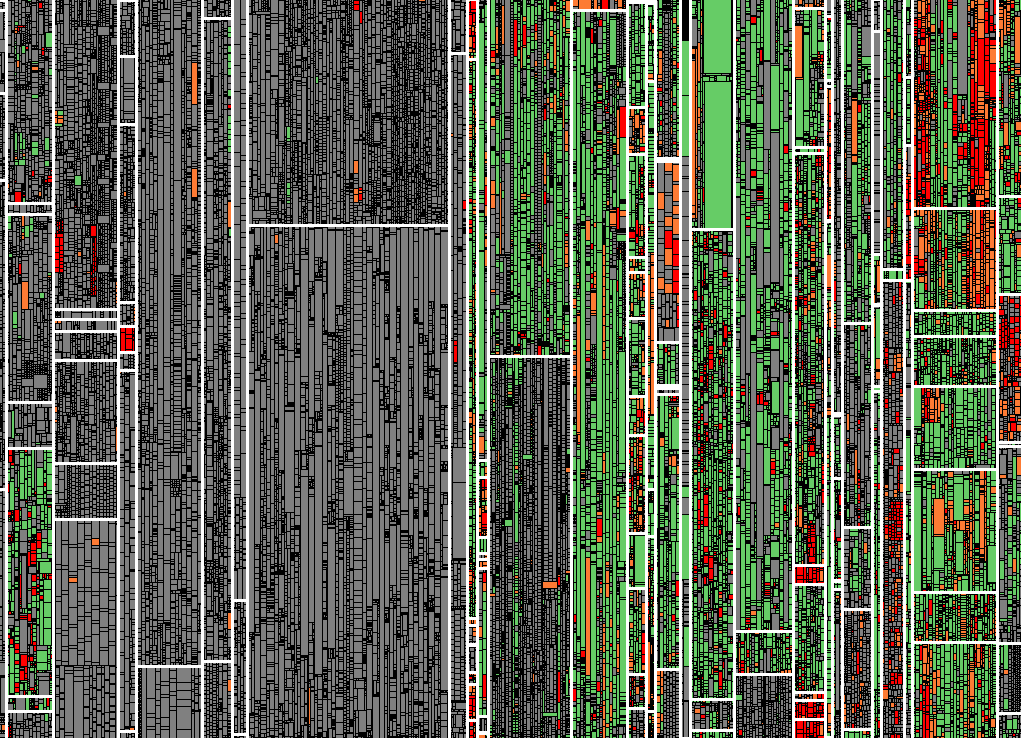
We find that putting a developer and a tester in the same room and showing them this tree map makes it easy to find out which test cases should be scheduled next: the developer knows what functionality the untested methods implement and the tester knows which test cases cover that functionality. This makes it possible for you to actively steer your testing efforts towards a clear goal with very little costs. And it’s just satisfying to see that tree map go from red and orange to all green over time.
If you think that your testing process could benefit from our test gap analysis, contact my colleague Elmar Jürgens!
Related Posts
Our latest related blog posts.


